bUILD A GARDEN BOARDWALK
PROJECT
IDEA:
Garden
Boardwalk
Build a boardwalk style path through a garden
In this video, you will learn how to easy it is to build a boardwalk style pathway through a garden using MultyDeck™! Match the 6" decking boards to an existing deck to extend a path through a garden! Create a secluded garden path for a sunny morning coffee, or evening retreat among the flower beds.


GROUND PREPARATION
ensure ground is flat and level
The MultyDeck™ bases can be assembled on virtually any type of surface including dirt or sand, gravel, sod, or cracked pavement, as long as it is flat and level. For this project, a garden boardwalk will be installed over landscape fabric on a flat part of the garden.
Mulch will be laid around the boardwalk. To level the ground quickly, a board can be used in a back-and-forth rocking motion to pull the dirt towards you to even out a surface. Ensure that the surface is tamped down, flat and even before installing your MultyDeck project.

MATERIALS REQUIRED
deck boards, MultyDeck™ rubber bases, and tools
For this project, we are building a 4-foot wide boardwalk style garden path with
Micropro Sienna pre-treated wooden decking boards.
You will need:
• 15 pieces 2"x6"x12-foot wooden decking boards, each cut into thirds yielding 45 pieces cut to 4-foot lengths
• 24 pieces of MultyDeck™ recycled rubber bases
• 1⅝" decking screws for the deck, and 3" decking screws for the trim.
• tools: utility knife, electric drill, circular saw
• OPTIONAL TRIM: 6 pcs of 2x2" x 8 ft trimboard for square set trim; 8 pcs of 2x2" x 8 ft trim for mitered corner (if desired - please note that no trim was used for this project)

PROTECT YOUR HANDS AND EYES
always wear PPE
As in all construction projects, remember to use the correct personal protective equipment. Always wear safety glasses, and protect your hands by wearing all-purpose utility gloves. This will drastically reduce the risk of eye and hand injury.

STEP ONE: MULTYDECK™ RUBBER BASES
economical and eco-friendly
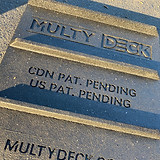
It all starts with our patented recycled rubber base. Made from used car tires, diverted from landfill, the bases are durable, weather resistant and provide traction under the floating deck to minimize slippage.
In this video, you will learn how to manipulate the rubber bases to customize the MultyDeck installation to create new deck patterns.

STEP TWO: BUILD THE PANELS
plan your design, measure the boards and cut-to-length, then build panels
For this project, we are not building a 48" wide garden boardwalk path. Each2x6" deck board has been cut to 48" long with a square cut. Starting upside down, fit the MultyDeck™ recycled rubber bases to the two outside edges of the boards. You will use two bases for each panel. This will leave no more than a 18" spacing between the two bases.
Proceed to build enough panels to accommodate the length of your boardwalk. In this project, we build 12 panels, and spaced them 5.5" apart to accommodate the joiner boards in Step Four.

STEP THREE: OPTIONAL USING ADHESIVE
use adhesive if you don't plan to dismantle the multydeck
For a more permanent solution, we recommend using adhesive on the side supports of the MultyDeck bases before inserting the joiner boards.

STEP FOUR: ADD THE JOINER BOARDS
place joiner boards over the side supports to join the panels
Screw the joiner boards down into the rubber of the side support of the MultyDeck base, screwing from the top with the 1 5/8" deck screws.

OPTIONAL STEP FIVE: ADD A TRIM
using 2x2" wooden trim boards, add an optional trim
To finish the deck, you an add a 2x2" border around the perimter. The corners can be done one of two ways. First, you can miter your corners. If you choose this option, cut mitered corners of the 2x2" trim at 45 degrees. You will need 8 pcs of 8ft long 2x2" trim.
Alternatively, you can use a square set option. There is no additional cutting required as the edges are already sold square set. You will need 6 pcs of 8ft long 2x2" trim. Secure the trim the MultyDeck by attaching with 3" deck screws. Screw through the 2x2" and into the wood of the MultyDeck.

ENJOY YOUR BOARDWALK PATH
maintain your wooden boardwalk garden path
Now that you have completed your MultyDeck garden path, it is time to kick back and relax and enjoy your outdoor living space. Remember that the gaps between boards for a MultyDeck is approximately 3/8" so be careful with footwear such as high heels.
Furthermore, remember that the wood of the MultyDeck needs to be maintained, just like any other deck. Do thoroughly clean the deck once a year, and be careful with power washers to treat the wood gently or else it can be damaged. If you wish to re-stain the wood, sand it beforehand.
The rubber MultyDeck bases keep the wood decking boards off the ground, and therefore allows drainage after rainfall. Always ensure that the water is freely draining away from your MultyDeck so that no pooling occurs underneath.
The MultyDeck recycled rubber bases are all-weather resistant, but the wooden boards are not. Ensure that you maintain the boardwalk, just like any other deck.
